Sunday 26 September 2010

Decorated Sugar Cookies


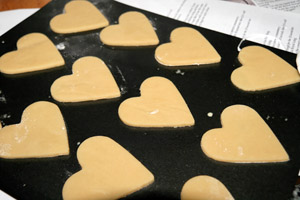
The September 2010 Daring Bakers’ challenge was hosted by Mandy of “What the Fruitcake?!” Mandy challenged everyone to make Decorated Sugar Cookies based on recipes from Peggy Porschen and The Joy of Baking.


So my kitchen looked like this when I started (below). This is the result of cooking/baking 3 different things at the same time. My sugar cookies and their icing, sushi for dinner and roasted banana ice cream (my first test of my new ice-cream bowl for the trusty kitchen-aid). Now I'm as good at multi-tasking as any other capable woman, but I only have so much counter space in my little kitchen, so I can;t say it wasn't challenging. But I guess that is just perfect for a daring bakers challenge hey :)


 I really enjoyed this challenge. I honestly don't remember the last time that I make biscuits with cookie cutters. The rolling and cutting and rolling and cutting of the dough had a very soothing effect on me and I just let my hands do the work and then let my mind wander away - back to the cool, tree-shadowed paths of my morning run. A peaceful place. With just the sounds of the runners feet on the damp soil and our heavy breathing; the cool air chilling our lungs and our sweat-soaked shirts... sorry, I digress. Back to the biscuits.  


The biscuit recipe itself was beautifully simple and the only change I made was to add almond essence to it instead of vanilla. I have a weakness for anything reminiscent of marzipan, macaroons and amaretto, so the almond vanilla substitute was a no-brainer. I did find the all rolling, chilling, cutting, chilling steps rather time consuming but with the amount of butter in these biscuits they do need all the help they can get to stay together once faced with the onslaught of heat from my rather zealous fan-oven, so the work was worth it.


The icing was whipped up in no time with my trusty kitchen aid and I was very careful to keep it covered up to prevent it from drying out and turning into sugar-cement as it certainly is prone to do if neglected even if for only a few minutes. I enjoyed trying out my new food-colouring gels in the icing and they certainly are as powerful as I'd hoped. Except for the red that is. My poppy red is rather orangey-inkish so I'm still in the market for a proper bright red, so the hunt continues. 


The icing of the biscuits was messy and great. I honestly felt like a kid again dripping multi-coloured icings all over the place. I was in a little bit of a rush by the time I came to doing the icing and the neighbours had dropped round for a drink and were watching my icing sugar covered creations with much amusement, so I was not as careful or artistic as I could have been given a few more hours, but I was fun and the biscuits taste great, so who's going to complain?


I look forward to the next challenge and hope it will be something incredibly different that I'd never done before. I'm feeling up for a challenge at the moment!

Sunday 19 September 2010

Butterey, Appley Apple Butter

The September 2010 Daring Cooks’ challenge was hosted by John of Eat4Fun. John chose to challenge The Daring Cooks to learn about food preservation, mainly in the form of canning and freezing. He challenged everyone to make a recipe and preserve it. John’s source for food preservation information was from The National Center for Home Food Preservation.
I really did not know what to expect with this challenge. Apple butter? Never heard of it! Apple sauce yes, know about that one, but apple butter? OK, lets give it a go and stick it in a jar and preserve it.
I think the most challenging part of this challenge was grating 2kgs of apples and not grating my finger off. I have to admit that the task did get tedious after a while and the apples, not at all happy with being left in the open air, soon started to go brown in protest. But all was not lost. Once it got cooking and started to break down into a delicious slushy mess who was to know about the creeping sneaky brownness. 


After about 40 minutes the apple was nice and soft and ready to be spiced up and blended. The smell of cooking apple and all those delicious spices in the house was just appetite-inducing temptation and the wait for it to get to its proper buttery non-water-releasing stage felt like a long one. I think that anyone out there using glade wisps or ambi-pur blah de blah should stop wasting loads of money on those overpriced air 'fresheners' and make a little batch of this. Your house will smell so good that the next handsome man you get to walk through your door will instantly fall in love with you and want have lots of sex and babies. (can I say that on my blog? Stuff it, its my blog so I can say what I flipping well want, so if you don't like it stop reading now!)

In about an hour the appley, watery mess had come together and embraced all the spice and cooking and become a thing of beauty. Delicious smelling, divine tasting, and devastatingly simple apple butter. Into my sterilised jar and it is now on standby ready to adorn a bagel, strudel, pie, or whatever I choose to dollop it on. 


Selecting, Preparing and Canning Fruit

Apple Butter

  • 2kg apples*
  • 1 cup apple cider
  • 1/3 cup sugar
  • 1 Tablespoon ground cinnamon
  • ¼ teaspoon ground cloves
  • ½ teaspoon ground allspice
*I used Granny Smith Apples

Yield: About 4 to 5 half-pint jars.

Procedure:
1.  Wash and rinse canning jars; keep hot until ready to fill.  Prepare lids and screw bands according to manufacturer’s directions.
2.  Wash apples well and peel. Cut apples into quarters or eighths and remove cores. 
3.  Combine unpeeled apples and cider in big saucepan. Cook slowly and stir occasionally to prevent sticking.  Cook until apples are very soft (falling apart).
4.  Process apples with a stick blender if you have one, or in a blender if you don't
 5.  Combine pulp with sugar and spices in large saucepan. Simmer over low heat, stirring frequently. 
6.  To test for doneness, spoon a small quantity onto a clean plate; when the butter mounds on the plate without liquid separating around the edge of the butter, it is ready for processing.  Another way to test for doneness is to remove a spoonful of the cooked butter on a spoon and hold it away from steam for 2 minutes. It is done if the butter remains mounded on the spoon.
7.  Fill hot apple butter into clean hot jars, leaving ¼-inch headspace. Wipe jar rims with a clean, dampened paper towel