Sunday, 18 July 2010

Daring Cooks - Nut Butters


The July 2010 Daring Cooks’ Challenge was hosted by Margie of More Please and Natashya of Living in the Kitchen with Puppies. They chose to challenge Daring Cooks to make their own nut butter from scratch, and use the nut butter in a recipe. Their sources include Better with Nut Butter by Cooking Light Magazine, Asian Noodles by Nina Simonds, and Food Network online.


This months challenge was deceptive in its simplicity I think. I did fine it very simple and easy to do, but the effectiveness of the nut butter and the totally unique element that it added to what would otherwise have been a very simple pasta dish was extraordinary. 


I would never have thought up the idea of making a nut butter myself. I am a huge fan of peanut butter and the delicious satay sauce I have made with it, so why it has never occurred to me to make a nut butter myself and think up some applications - I don't know. I can't say that I am the world's most creative cook so that is probably why I can take someone else's recipe and put my own twist on it and make it uniquely mine, but to think up something from scratch is sadly beyond my talents I think. 


This is why I am grateful for the Daring Cooks and Bakers. It inspires me in completely unique ways, allows me the opportunity to step outside of my comfort zone, and try something different with the moral support and inspiration of all the other Daring Cooks. I have to admit that I was not sold on the idea of mushrooms and pecan nuts but it is a gorgeous combination and one that I will certainly be trying again. 

Chicken with Pecan Cream & Mushrooms
Yield: 4 servings
Ingredients:
Pecan Cream:
3/4 cup (180 ml) coarsely chopped pecans*, toasted
1 cup (240 ml) water
¾ teaspoon (3 ml) salt, more as needed
½ pound (225 g) pasta
4 (6-ounce / 170 g) boneless, skinless chicken breasts
1 teaspoon (5 ml) olive oil, more as needed
Salt & pepper to taste
Sauce:
1 tablespoon (15 ml) deglazing liquid (water, broth, wine; optional)
1 teaspoon (5 ml) olive oil, more as needed
1/4 cup (60 ml) finely chopped shallots
½ pound (225 g) mushrooms, sliced
1 Tablespoon (15 ml) fresh thyme leaves
Chopped pecans, (optional garnish)
Directions:
  1. Prepare pecan cream. Grind pecans in a food processor for about a minute or so until smooth, scraping down the sides of bowl as needed. Add water and 3/4 teaspoon (3 ml) salt; process until smooth, scraping sides of bowl as needed. Set aside pecan cream. (*If starting with prepared pecan butter, blend ¼ cup plus 2 Tablespoons (90 ml) pecan butter with the water and salt until smooth.)
  2. Cook pasta according to package instructions in salted water. Drain, rinse, and keep warm.
  3. Cut chicken into even strips/cubes as desired. Sprinkle with a bit of salt and pepper to taste. Heat 1 teaspoon (5 ml) olive oil a large nonstick skillet over medium-high heat. Add half the chicken; sauté 3 to 5 minutes on each side or until cooked through. Cook the chicken in 2 batches, adding more oil if needed for second batch. Set aside cooked chicken on a clean plate, cover to keep warm.
  4. Add deglazing liquid to pan if using and stir up any browned bits. If needed, add another teaspoon (5 ml) of oil (or more) to pan for sautéing the shallots and mushrooms. Sauté the shallots and mushrooms over medium heat for 4 to 6 minutes or until mushrooms are tender and starting to brown. Add fresh thyme to the pan. Stir in pecan cream; bring to a boil. Reduce heat and simmer for about 1 1/2 minutes till reduced slightly.
  5. Slice chicken into thin strips. Divide the noodles among serving plates. Add a scoop of the mushroom pecan sauce on top of noodles. Lay sliced chicken on top. Garnish with fresh thyme and/or a pinch of chopped pecans if desired.

Friday, 9 July 2010

Leek Bread Pudding


When I read this post on Smitten Kitchen I could not help being tempted. I only discovered leeks a couple of years ago. I think the delay in my leek enlightenment was due to never having had it as a child, and therefore not instinctively knowing how to use it as an adult. I think that a lot of my ingrained food ideas stem from the food I grew up with, but there are a couple of gaps as there are some things that my mom never fed us as kids, probably because one (or more) of us 4 siblings would have refused to eat it.


And she was probably right. There are a whole lot of things that I didn't like as a child; Mushrooms (always picked them out of my mom's chicken-a-la-king), green pepper (also picked them out of my mom's chicken-a-la-king), other colour peppers, mayonnaise (don't know why, I was just scared of it); but thankfully my tastes have since matured and enjoy an array of colours, textures and flavours I did not know as a child.


So one of the challenges with this recipe was that I could not find a brioche loaf at the shop. I'm sure that they must be available somewhere, maybe from a bakery or deli, but I thought the easiest solution would be for me to make one. I have made bread plenty of times in the past and I have good, strong kneading arms so a little bread doesn't scare me. I am sure that there must be many brioche recipes out there with various merits, and to be honest the one I used was not great, so I am not going to post the recipe for it. I'm sure that I, or you, could do a lot better so there are a couple of pictures but not gory details.


The leek bread pudding itself was a new experience for me. Although the English do love their bread and butter pudding, I am not a native English-person and it does not appeal to me that much really. I find it a bit stodgy and the thought of bread for dessert after dinner is a bit intimidating. But this idea of a bread pudding, with leek herbs and cheese, for dinner itself... now thats something that does tickle a few of my tastebuds.


It was not a difficult or time-consuming recipe, and the smells of cooking leeks and browning brioche go a long way towards stirring up your appetite on a Sunday afternoon. I also find something so homely any comforting about home-cooking smells. No matter how bad a day I may have had or how rainy and grey the day is, the warm, welcoming smells of my kitchen never fail to make me smile. It also reminds me of how I have my own kitchen, and how lucky I am for that. And also how far I have come from the days when I used to make pinwheel biscuits and lamingtons in my mom's kitchen when I was in my early to mid teens. I didn't realise back then how much I enjoyed cooking/baking. Maybe if I had I would have pursued a food-related career, but how it turned out, cooking is my solace and my escape. My mind has always been methodical and logical and following and developing a recipe allows brain work without complications. I love it.


This bread pudding tastes great the next day to, maybe even better from it overnight chance for the flavours to settle and cosy together. So don't be intimidated by the size of a whole loaf, go for it - you won't regret it.


Leek Bread Pudding

Makes one loaf. Double the recipe to fit in a 9×13 baking dish.
Serves 6 as a side dish

1 cup leeks in 1/2-inch thick slices, white and light green parts only, cleaned and rinsed
Coarse salt
2 tablespoons (1 ounce) unsalted butter
Freshly ground black pepper
6 cups 1-inch-cubed crustless brioche
2 teaspoons finely chopped chives
1/2 teaspoons fresh thyme leaves
1 large egg
1 large egg yolk
3 cups whole milk, heavy cream or a combination thereof
Freshly grated nutmeg
1/2 cup shredded Emmanthaler or Swiss cheese

Place a medium sauté pan over medium-high heat, drain excess water from leeks, and add to pan. Season with salt, and sauté until leeks begin to soften, about 5 minutes, then reduce heat to medium-low. Stir in butter. Cover and cook, stirring occasionally, until leeks are very soft, about 20 minutes. Adjust salt and pepper to taste.

Preheat oven to 350 degrees. While leeks are cooking, spread bread cubes on a baking sheet and bake until dry and pale gold, about 15 to 20 minutes (my already-stale brioche took less time to brown), turning pan about halfway through. Transfer to a large bowl, leaving the oven on.

Add leeks, chives and thyme to the bowl of bread; toss well. In another large bowl, lightly whisk the egg and egg yolks, then whisk in milk or cream, a generous pinch of salt, pepper to taste and a pinch of nutmeg.
Sprinkle 2 tablespoons shredded cheese in bottom of a buttered 9-by-5-inch loaf pan. Spread 1/2 of bread mixture in pan, and sprinkle with another 2 tablespoons cheese. Spread remaining bread mixture in pan, and sprinkle with another 1/4 cup cheese. Pour in enough milk mixture to cover bread, and gently press on bread so milk soaks in. Let rest 15 minutes.

Add remaining milk mixture, letting some bread cubes protrude. Sprinkle with salt. Bake until pudding is set and top is brown and bubbling, about 55 to 65 minutes. Serve hot or cold 

Friday, 2 July 2010

A Big, Beautiful Almond & Raspberry Layer Cake


There are no 2 ways about it, I love making cakes. Don't get me wrong, I like all my other cooking as well and the Daring Cooks challenge for the month that I completed last night was wonderful, but somehow they don't stand up to a rich, almondy, 3 layer, jam filled, ganache covered bohemoth of a cake. The problem is that there are only 2 of us in the house and if I had to make one of these beauties every week, well we'd very quickly have to buy larger jean sizes. As my waistline is something that I run at least 30kms a week to try and keep under control, I cannot take that risk. So when the opportunity arises that I can make a cake for someone else, and only have one lovely piece and then offload the rest, I tend to jump at it.


This is yet another gem from Deb at Smitten Kitchen, adapted from Sky High. A cake book which she raves about and one I am dying to invest in. Maybe I shall treat myself (and everyone else who gets to eat my cakey creations) next month.


Now this recipe calls for some American thing called 'almond paste' which after my google-research turned out to be a marzipan-type thing. So as we do not have this conveniently in a tube/tub/bag or however it is packaged in the US of A, I made up a simple marzipan and used that instead (pics above), and I cannot fault it as the cake turned out beautifully.


 It may look intimidating but this cake really is not hard work at all and it does not take long to make, and the ooohs and aaaahs of appreciation that you get will be well worth the effort. Assuming that your taste-audience like almond that is. Personally the rich almond flacour in this cake, punctuated by the tang of the raspberry jam is just a perfect match. However, I would not use the chocolate ganache icing again as it did not give credit to the cake itself I don't think, I would definitely investigate a more complimentary icing if you are going to give this a go.


As far as the cake constuction goes, I trimmed the tops of my 3 cakes as they had risen a little more round the enges than in the middle and it is important when building a cake up that the building blocks are as flat as possible. I did it with a long bread knife by eye as I am not going to crack out the spirit level just for a ckae but if you want to use a spirit level or other exact-measuring device, please do go ahead. The consistency of the cakes is fairly firm so they co-operate with the cutting and stacking process quite well and don't threaten to break unless you really manhandle them. As for the jam filling, I warmed up my jar of seedless raspberry jam in the microwave for 20 seconds or so just to make it easier to spread as its room-temperature consistency was a very stiff jammy, and not condusive to crumbless spreading (on cake that is, I'm sure on toast it would have been perfectly fine).


Almond Paste

Ingredients
225g/8oz icing sugar
225g/8oz caster sugar
450g/1lb ground almonds
2 eggs, beaten lightly
1 lemon, juice only

Preparation method
1.Sift the icing sugar into a mixing bowl and add the caster sugar. Toss in the almonds and stir.

2.Add the lemon juice. Now stir in the eggs, bit by bit to make a firm, stiff dough.
3.Roll into a ball and knead lightly. Place into a plastic bag until you need it.


Almond Rasberry Layer Cake

Makes a 9-inch triple layer cake that serves 16 to 20 people

4 1/2 cups cake flour
4 1/2 teaspoons baking powder
3/4 teaspoon salt
2/3 cup prepared almond paste (7 ounces)
2 2/3 cups sugar
2 1/2 sticks (10 ounces) unsalted butter, at room temperature
1 tablespoon almond extract
10 egg whites
1 1/2 cups whole milk
For assembly:
1 cup simple syrup (to keep cake moist)(optional - I found I didn't need it as the cake was beautifully moist already)
1 cup seedless raspberry preserves

Frosting ideas: Swiss Buttercream (with or without two teaspoons of almond extract for flavoring), Cream Cheese Frosting or Whipped Bittersweet Frosting (recipe below)

1. Preheat oven to 350°F. Butter the bottoms and sides of three 8-inch (but 9-inch will work just fine) round cake pans. Line the bottom of each pan with a round of parchment or waxed paper and butter the paper.
2. In a medium bowl, sift together the cake flour, baking powder and salt. Set the dry ingredients aside.
3. Place the almond paste and sugar in the bowl of a heavy-duty mixer fitted with the paddle attachment, or in another large bowl if using a handheld mixer. Begin to cream the mixture on low speed to break up the almond paste, then increase the speed to medium for about 2 minutes, or until the paste is broken into fine particles.
4. Add the butter and almond extract and beat it well, then the egg whites, two or three at a time, beating just long enough to incoperate after each addition. Scrape down the sides of the bowl several times to make sure it is evenly mixed.
5. Dust about a third of the dry ingredients over the batter and fold in with a large rubber spatula until just combined. Fold in about half the milk. Fold in half the remaining flour mixture, followed by the remaining milk. Finally, fold in the last of the dry ingredients just until no streaks of white remain. Use a light hand and do not overmix. Divide the batter among the three prepared cake pans.
6. Bake for 25 to 30 minutes or until a cake tester or wooden toothpick stuck into the center comes out clean. Let the cakes cool in their pans on wire racks for about 10 minutes. Turn the cakes out on to wire racks, carefully peel off the paper liners and let them cool completely, about one hour.
7. Assemble the cake: Place one layer flat side up on a cake stand or serving plate. Slide small strips of waxed paper under the edges to protect the plate from any messiness accumulated while decorating. Brush first layer with simple syrup, if using. Spread 1/2 cup of the raspberry preserves over the cake, leaving a 1/4 inch margin around the edges. Repeat with the second layer, brushing syrup if using and using remaining preserves. Add the third layer and brush with syrup if using.
8. Spread a thin layer frosting of your choice over the top and sides of the cake. Let frosting set in the fridge for about 20 to 30 minutes (this is your crumb coat) then spread a thicker, decorative coat over the base coat. If you have any frosting remaining, pipe a decoration of your choice.

Whipped Bittersweet Frosting
Makes about 3 cups, or enough to coat a three layer 8- or 9-inch cake. You’ll want 1 1/2 this amount if you’re using it for filling as well.

7 ounces bittersweet chocolate
1 cup heavy cream
1 stick (4 ounces) unsalted butter, at room temperature

1. Melt the chocolate with the cream in a double boiler or metal bowl set over a pan of simmering water. Whisk to blend well. Remove from heat and let stand, whisking occasionally, until the chocolate mixture thickens to the consistency of mayonnaise. (No doubt, exactly what you want to think about when making chocolate frosting).
2. Place the butter in a large mixer bowl and with an electric mixer on medium speed, whip the butter until light and fluffy. Add the chocolate cream and whip until lighter in color and somewhat stiff, about three minutes. Do not whip too long or the frosting may begin to separate.

Wednesday, 30 June 2010

Come Dine with Me


I have the pleasure of working with a few great people who do appreciate fine food. In one of our fine food related discussions one day it came up that some time prior to me joining the company, a few of the guys and girls in the office had held their own version of Come Dine with Me. Being the foodie that I am my ears pricked up at this and I was very keen on the idea of repeating this event.

I had not originally intended to go first, it just happened somehow. I don't know if it was fate or my colleagues conspiring against the Office Come Dine with me newbie, but despite the fact that someone else had a date booked in before me, that date was scrapped due to the unavailability of certain unnamed persons, and I ended up first in line for the chopping block.

I don;t have many pictures of the food to be honest. Partly because I did a lot of the preparation ahead and I have (still!) not gotten into the habit of taking photos as I go so by the time that it occured to me that this evenings creations would make for a good blog post, I'd annoyingly done most of it already. I do have a couple of food pictures however so I will share them in the spirit of proving that I did actually do this and I am not making it up. I did a 3 course meal for 4 people and was not remotely stressed at any point in the evening!

The starter I made was a Prawn and Salmon Pate with Homemade French Loaves. This was the Daring Cooks challenge for last month that I did not get done in time for that reveal, but I had really wanted to do it, and it was acually a lot easier than I thought! Our hostesses this month, Evelyne of Cheap Ethnic Eatz, and Valerie of a The Chocolate Bunny, chose delicious pate with freshly baked bread as their June Daring Cook’s challenge! They’ve provided us with 4 different pate recipes to choose from and are allowing us to go wild with our homemade bread choice. Even the french loaves which are the ones I attempted, although the took hours and hours and hours and hours in the making process, were not remotely difficult. The problem is, I did not take a photo. I have 3 witnesses who will vouch for the fact that I did make it, it did taste nice and they devoured the WHOLE LOT, but I am an idiot, and I did not photograph it. It was supposed to look like this (below) and it looked rather similar and it tasted amazing, as did the bread. But without photographic evidence nobody will really believe me I'm sure.


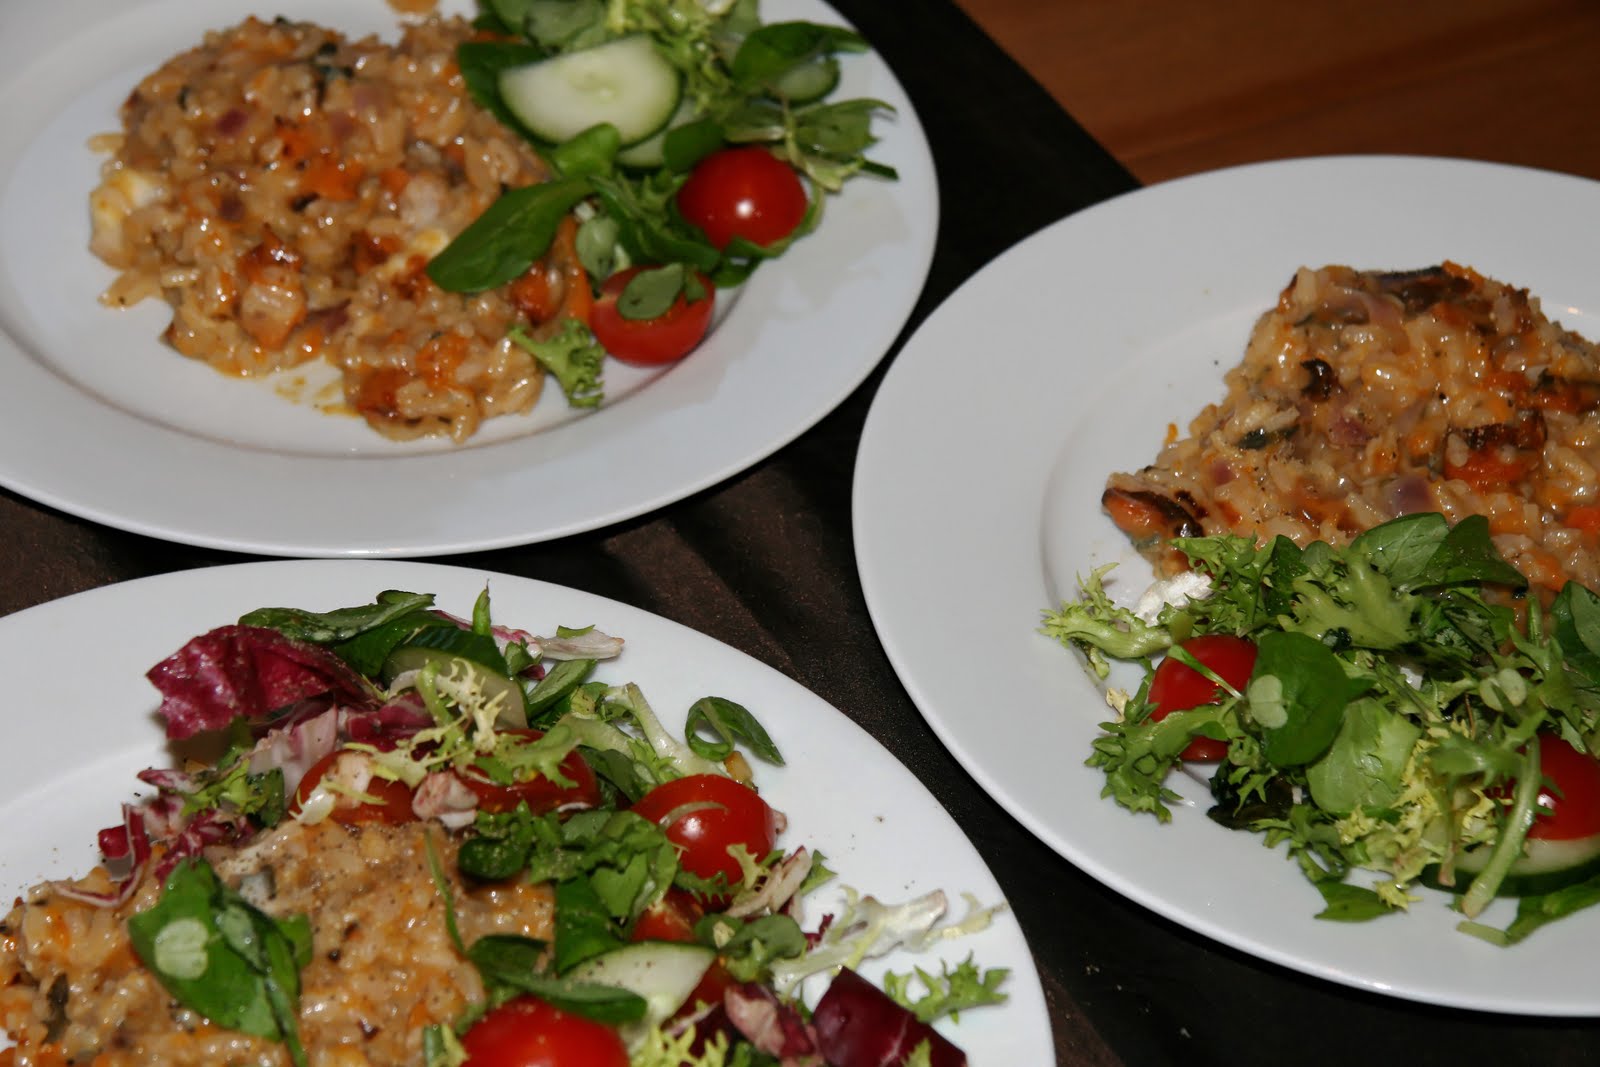
Then there was the main course - Blue Cheese and Butternut Risotto, which I did take a little lonely photo of. It was the only one of the three courses that I made on the night and it took a little time as Risotto generally does, but it was good. It was not my best attempt at this risotto but as I was entertaining at the same time and dashing in and out of the kitchen to stir, I hope that I can be forgiven. My guests certainly did not seem to mind.But after that much red wine, pretty much anything tastes good! My strategy worked, hahahahaha!


(Empty plates, good sign!)

Dessert was a Amaretti 'semifreddo' which I have never attempted before. I really wanted to make an ice cream but the lack of ice-cream machine and the laziness of not wanting to churn endlessly steered me away from that option. Then I discovered the concept of the semifreddo which I have to admit I had heard of, but I did not really know what it was. The beauty of it was that, again, I would make it in advance and it used LOTS of cream and amaretti biscuits and coffee and amaretto, which can only be a good combination. I decided to make the amaretti biscuits as one of my dinner guests is gluten-intolerant and as they were just biscuits they could also be made ahead, and how hard could it be? In my humble opinion dessert turned out gorgeous. So smooth and creamy and punctuated here and there with the bite of amaretto and soft coffee soaked amaretti biscuits. Yum! The only little blip in this plan was that the recipe I had made SO, SO much! I had assumed that it would fill a normal size loaf tin (to later be sliced in an ice cream loaf kind of way). But how wrong I was. I ended up filling my loaf tin, and another glass bowl and half an ice cream tub! But too much is better than too little, and if all else fails, I can feed it to the gannets, uh colleagues, at work.


All in all I would say that the evening was a success and lots was eaten and drank buy all and although we ended up very full and slightly tipsy, I'd do it again tomorrow. Roll on the next dinner and hopefully remembering to take photos! Bad Claire, Bad Claire!


Trout and Shrimp Pâté
Yields one 6x3 inch (15x7,5 cm) terrine or loaf pan

1 tbsp / 15 ml butter
1/4 lb / 4 oz / 120g medium raw shrimp, deveined, shelled and tailed (about 12 medium shrimp)
1/8 cup / 30ml Cognac (or Grand Marnier, or another strong liqueur of your choice) (optional)
1/2 lb / 8 oz / 240g trout filet, skinned and cut into thick chunks
1/4 lb / 4 oz / 110g raw shrimp, deveined, shelled and tailed (any size)
3/4 cup / 180ml heavy cream
Salt, to taste
Coarsely ground black pepper, to taste
Chives, for garnish

Preheat oven to 375ºF (190ºC).

In a heavy, flameproof frying pan, melt the butter over medium-high heat. Sauté the 1/4 pound of medium shrimp, stirring often, until pink and cooked through. Remove the pan from heat. (NOTE: These shrimp will be used to form layers within your pâté. If you feel they are too thick – like the ones in the photograph, you might want to slice them in half lengthwise.)

Pour the Grand Marnier over the cooked shrimp. Light a match and carefully ignite the alcohol, to flambé the shrimp. Wait for the flames to go out on their own, carefully tilting the pan to ensure even flavoring. Set aside.

Put the trout and the remaining raw shrimp in a food processor and pulse. Gradually pour in the cream and keep pulsing until you obtain a smooth mixture that is easy to spread, but not too liquid (you may not need to use all the cream). Season with salt and green pepper.

Butter a 6x3 inch (15x7,5 cm) loaf pan or terrine, then line it with parchment paper. Spoon in half the trout mixture, and spread it evenly. Place the flambéed shrimp on top, in an even layer, reserving 3 or 4 shrimp for decorating. Top with the remaining trout mixture.

Prepare a water bath: place the loaf pan in a larger, deep ovenproof dish (such as a brownie pan or a baking dish). Bring some water to a simmer and carefully pour it in the larger dish. The water should reach approximately halfway up the loaf pan.

Put the water bath and terrine in the oven, and bake for 35 minutes. The pâté should be cooked through and firm in the center.

Remove the pan from the water bath and let cool. Carefully unmold onto a serving platter. Decorate with the reserved shrimp, and sprinkle with chopped chives. Cut into thick slices and serve at room temperature, with crusty bread.

French Baguette
yield: Three 16" baguettes

Starter
1/2 cup / 120 ml cool water
1/16 teaspoon active dry yeast
1 cup / 240 ml flour

Dough
1 tsp / 5 ml active dry yeast
1 cup to 1 1/4 cups / 240 ml to 300 ml lukewarm water*
all of the starter
3 1/2 cups / 840 ml flour
1 1/2 tsp / 7 ml salt

*Use the lesser amount in summer (or in a humid environment), the greater amount in winter (or in a dry climate), and somewhere in between the rest of the year, or if your house is climate controlled.

Make the starter by mixing the yeast with the water, then mixing in the flour to make a soft dough. Cover and let rest at room temperature for about 14 hours; overnight works well. The starter should have risen and become bubbly.

Mix active dry yeast with the water and then combine with the starter, flour, and salt. Mix and knead everything together—by hand, mixer or bread machine set on the dough cycle—till you've made a soft, somewhat smooth dough; it should be cohesive, but the surface may still be a bit rough. Knead for about 5 minutes on speed 2 of a stand mixer.

Place the dough in a lightly greased medium-size bowl, cover the bowl, and let the dough rise for 3 hours, gently deflating it and turning it over after 1 hour, and then again after 2 hours.

Turn the dough out onto a lightly greased work surface. Divide it into three equal pieces. Shape each piece into a rough, slightly flattened oval, cover with greased plastic wrap, and let them rest for 15 minutes.

Working with one piece of dough at a time, fold the dough in half lengthwise, and seal the edges with the heel of your hand. Flatten it slightly, and fold and seal again. With the seam-side down, cup your fingers and gently roll the dough into a 15" log. Place the logs seam-side down onto a lightly greased or parchment-lined sheet pan or pans.

Cover them with a cover or lightly greased plastic wrap, and allow the loaves to rise till they've become very puffy, about 1 1/2 hours. Towards the end of the rising time, preheat your oven to 450ºF (240ºC).

Using a very sharp knife held at about a 45° angle, make three 8" vertical slashes in each baguette. Spritz the baguettes heavily with warm water; this will help them develop a crackly-crisp crust.

Bake the baguettes until they're a very deep golden brown, 25 to 30 minutes. Remove them from the oven and cool on a rack. Or, for the very crispiest baguettes, turn off the oven, crack it open about 2", and allow the baguettes to cool in the oven.


Butternut squash and creamy blue cheese risotto recipe

Risotto is such a thick, comforting and easy Italian dish. The creamy blue cheese adds a lovely dimension of flavour to the subtle layers of herbs and white wine in this satisfying rice and squash dish.


Serves 4
Ready in 1 hour

Ingredients
500g butternut squash, peeled, deseeded and cut into small pieces
15-20 fresh sage leaves
3 tbsp olive oil
1 tbsp butter
1 large onion, finely chopped
150ml dry, fruity white wine, such as Pinot Grigio
350g arborio rice
1-1.5l good quality vegetable stock (I use Knorr stock pots if I don't have any homemade stock in the freezer)

125g pack Blue cheese (I prefer Dolce Latte as its so beautifully creamy)

1. Put the squash into a large baking dish. Add 15 sage leaves torn up, 2tbsp of olive oil and salt & pepper. Roast for 40 minutes or until soft and slightly browned. When done, remove from the pan with any juices and crush slightly with a fork.

2. Heat 1 tablespoon of the oil and the 1 tbsp of butter in a heavy-based pan and fry the the onion for about 10 minutes, until very soft but not coloured.

3. Add the rice to the pan and stir well. Increase the heat and stir for 30 seconds, add the wine and stir until it evaporates – about 2 minutes.

4. Start adding the liquid stock, a ladleful at a time, stirring until it has been absorbed before you add another ladleful of stock. After about 20 minutes, all the stock will have been absorbed and the rice will be creamy but still have a little bite. Pour in the squash and stir until hot. Crumble over two-thirds of the cheese and fold into the rice. Ladle into bowls, crumble over the remaining cheese and serve.


Amaretti & Coffee Semifreddo
Serves 12


This recipe left me a little perplexed, I have to admit. It says that it serves 12, and the mixture should fit into a loaf tin, but I somehow ended up with double the mixture to fill my loaf tin. The dessert turned out lovely but the quantitiy did perplex me. You might try halving the eggs milk sugar and cream to make a bit less. 
12 Amaretti biscuits, roughly crumbled
1/3 cup strong black coffee
2 tbsp Amaretto di Saronno
6 egg yolks
Few drops of pure vanilla
3/4 cup milk
250g castor sugar
3 3/4 cups cream, softly whipped
Sweet almond oil

Soak biscuits in coffee and liqueur while you prepare custard. Use an electric mixer to beat egg yolks and vanilla until very thick and lemon coloured. Heat milk and sugar to simmering point in a saucepan and stir until sugar has dissolved. Simmer for 2 minutes, then pour onto beaten egg yolks with the mixer motor running and continue to beat until cold. Fold in cream lightly but thoroughly. Swirl in soaked biscuits with any remaining liqueur - do not blend completely, as the lumps of biscuits and veins of liqueur are part of the charm.

Brush a 1.5-litre log mould with almond oil and line it with a doubled strap of foil. Pour mixture into mould and freeze. Cut into thick slices to serve.

Tuesday, 29 June 2010

Cheesecake Marbled Brownies


I am not someone who ever needs to look hard for an excuse to bake, so an invitation to a neighbour's barbecue is more than enough of a reason to trawl through all the recipes in my to-do list. The hunt for a super sexy looking chocolate/cheese indulgence was not a long one and surprisingly I has all the ingredients for this recipe in the house already. Its like it was meant to be. It was fate. My neighbours have heard from my beloved other half that I like to bake and they have already had the (maybe somewhat dubious) pleasure of being my guines pigs before, so I thought that the least I could do if they were going to supply their perfectly BBQ-ed meat and super tasty salads is provide the sweet kick to round the whole thing off. It may be just me and my weakness for all things chocolate, but I don't feel as though a meal is really over unless I have had a little something sweet. Its like trying to end a sentence without a full stop, or end a long run without a good stretch and a sweaty sigh of contentment - it just isn't right.
 

So after raiding my cupboards and fridge with a joyous abandon that only the promise of a heavenly slice of chocolate brownie with a delectable swirl of cheesecake thorugh it can give me, I set to work being all organise (not a normal state for me). I chopped and measured and poured until all the components of this magical creation were ready to come together and form a little slice of heaven. (I am not blowing my own trumpet here by the way - I am not the creator of this heavenly recipe, I am merely the translator for my own little batch. All the credit goes to the original authors at Gourment and Deb at Smitten Kitchen for her wealth of knowledge translated into subtle but oh so effective changes)


Don't let yourself be put off by the seeming complicatedness of this recipe. Is is not actually complicated or difficult or time consuming at all. And the tiny bit of extra effort, which is all that is required really, is very well worth it. The fudgy brownie swirled with the tangy cheesecake is a tick in the chocolate-fix box, and was most appreciated by my bbq-hosting neighbours - and acted as a good birthday cake substitue as the cheeky man had not told us it was a birthday-celebratory bbq, how rude! Candle in the brownie pile worked well.


Cheesecake-Swirled Brownies
From Smitten Kitchen, Adapted from Gourmet, June 2007

Makes 16 2-inch square, thick brownies
Brownie batter
1 stick (1/2 cup or 4 ounces) unsalted butter, cut into pieces
3 ounces unsweetened chocolate, chopped
1 cup sugar
2 large eggs
1/2 teaspoon pure vanilla extract
2/3 cup all-purpose flour
Cheesecake batter
8 ounces cream cheese, well softened
1/3 cup sugar
1 large egg yolk
1/4 teaspoon pure vanilla extract
Plus
1/2 cup semisweet chocolate chips

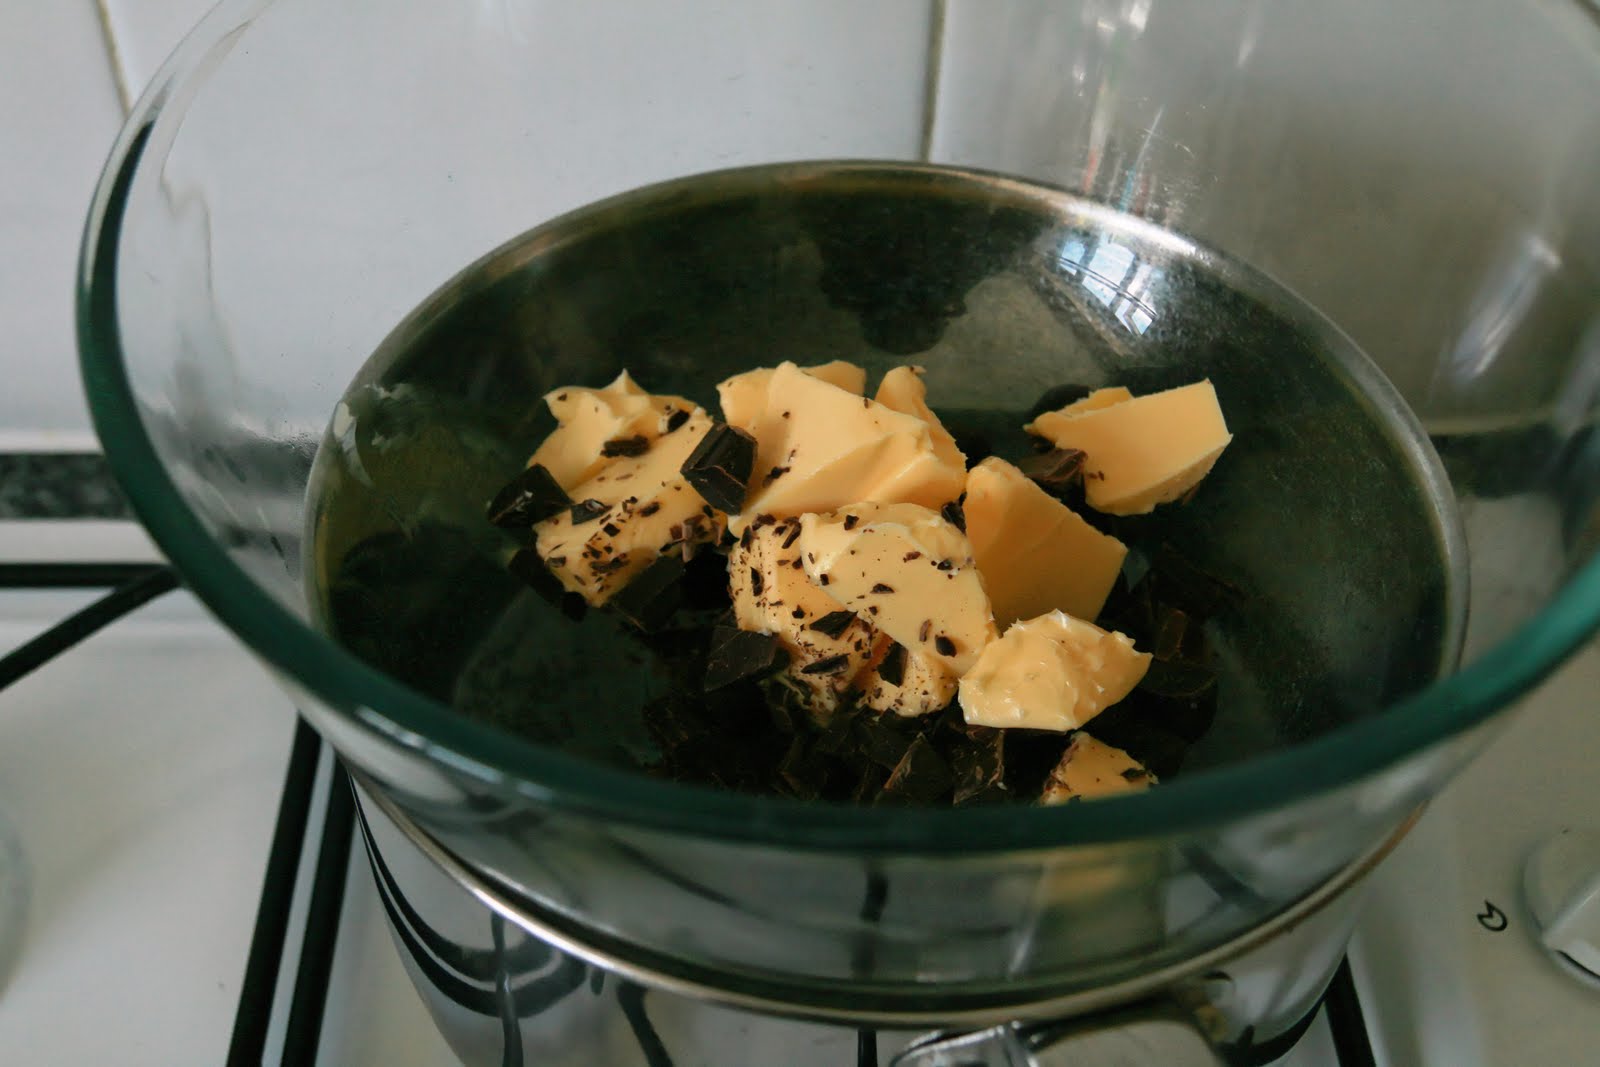
Make brownie batter: Put oven rack in middle position and preheat oven to 350°F. Butter an 8-inch square baking pan. Heat butter and chocolate in a 3-quart heavy saucepan — though I did mine double-boiler style, placing the mixing bowl I was using over simmering water, thereby creating one less dirty dish and melting the chocolate more gently — over moderately low heat, whisking occasionally, just until melted. Remove from heat and whisk in sugar, eggs, vanilla, and a pinch of salt until well combined. Whisk in flour until just combined and spread in baking pan.
Make cheesecake batter: Whisk together cheesecake batter ingredients in a small bowl until smooth. Dollop over brownie batter, then swirl in with a knife or spatula.
[I actually like using a butter knife because the tip of it is round enough that you can use it to fold bits of the brownie batter over the cheesecake batter for a more visibly marbled effect. Try it!]
Sprinkle chocolate chips over cheesecake/brownie batter swirl. Although it might be more logical to just mix them into the cheesecake batter (and feel free to do this, it will have no ill-effect) I thought it might interrupt the swirl-ability of it.
Bake brownies: Bake until edges are slightly puffed and center is just set, about 35 minutes. Serve warm or at room temperature.

Friday, 14 May 2010

THE DARING COOKS MAY, 2010 CHALLENGE: STACKED GREEN CHILE & GRILLED CHICKEN ENCHILADAS


Our hosts this month, Barbara of Barbara Bakes and Bunnee of Anna+Food have chosen a delicious Stacked Green Chile & Grilled Chicken Enchilada recipe in celebration of Cinco de Mayo! The recipe, featuring a homemade enchilada sauce was found on www.finecooking.com and written by Robb Walsh.

When I first read the details of this challenge I honestly did not think that it would be all that challenging (this months daring bakers has been the one giving me nightmares!). How little did I know. My first challenge was sourcing ingredients. The only tomatillos that I could find ANYWHERE were the tinned variety. As i have never seen these before let alone used them in my cooking I was not certain that these would suffice, but I did not really have much of a choice. The next challenge was the chillis to use for teh green chilli sauce. Nowhere I hunted had large, no-so-hot green chillis of the type described in the recipe and in all my online research I could not find any alternatives locally available. So I had to get creative with the ingredients.


I also thought that I'd make my own tortillas which was not a requirement but I thought would be fun (ha!) and not that hard (ha ha!). This, was a disaster, to say the very least. The first batch were a total write off and the 2nd batch were barly passable because we were so tired by that stage that we did not much care what we were going to eat as long as we could eat and then go to bed! I don;'t know whether it was my lack of tortilla pan that was the issue or some part of my dough-mixing technique but the tortillas did not look pretty and they tasted barely edible.


But, it was a good laugh so I can't really grumble. My chilli sauce ended up being a red chilli enchilada sauce rather than a green one due to the (un)availability of ingredients but it had a good flavour and packed quite a kick which went really well with the chicken, tortillas and cheese (although I ran out of cheese so had none left to put on the top). I also made mango salsa and guacamole to go with the enchiladas as no mouthful of enchilada is complete without them. My final verdict? I do love a good enchilada, but (and I know its complete and utter sacrilege) I may stick to the Old El Paso kits in future!


Or at least that is how I was feeling at 9pm after making overly hot chilli sauce, bizarre tasting mole sauce and the ugliest tortillas that I have ever seen. Honestly, I will probably attempt these guys again some time, maybe when I have a whole day to spare and not feeling under the week-day pressure. I may resort to store-bought tortillas though as mine were just too horrendous for words.  That will teach me to underestimate the challenge of a DC challenge!


I am now determined that next month will be better and I will NOT underestiamte the challenge and I WILL make a sucess of it!