Wednesday, 12 May 2010

Chocolate & Pumpkin Brownies


The English and the South Africans for that matter do not have the tendency to use Pumpkin in sweet dishes like the Americans do. In fact, I have not seen ANY sweet pumpkin dishes while I have been in the UK and the only Pumpkin Pie I ever saw in South Africa was made by the American mother of my American friend. I do have fond memories of that pumpkin pie however so when I came across this recipe for Chocolate and Pumpkin Brownies, I was fascinated and it certainly appealed to the adventurous side of my baking persona. So I thought I'd give it a try. The first obstacle was finding tinned pumpkin, not a common ingredient in Manchester, England. I did manage to source it from an online American food shop.


So on Saturday afternoon while taking a break from my latest pewtering project, which I'd been working on for a good few hours and was getting rather achey hands & wrists, I set to work on the brownies. I find that there is something incredibly soothing to me in the baking process. I find myself in a sort of relaxed trance while pulling out all the ingredients, measuring, weighing and even lining the baking tin. I know many people who find baking very stressful, so call me a freak if you will but I simply love it.


The initial process was much the same as any other brownie recipe. Chopping chocolate, melting it with butter, mix the dry ingerdients together, etc. but I was absolutely fascinated by the step where it came to dividing the mixture in half and adding the chocolate to one half and the pumpkin to the other half. The recipe had warned that the chocolate half of the mixture may be very stiff and hard to spread in the tin but luckily I had no such problem. Things did get interesting though when in my baking-induced coma I threw the whole tin of pumpkin into the mixture, mixed well, and then realised that I was only supposed to use a cup and a half. But as it was too late by this time to turn back, I just carried on and hoped for the best whith crossed fingers (and toes!).


Luckily while lining the brownie tin I had left a good 5cm of baking parchment up all 4 sides and this rescued my very full brownie tin from overflowing. If it had not been for that I would have had a very, very messy oven and baking tin and I may have been scared off using pumpkin for like. So after layering my 2 mixtures in my very full tin, it went into the oven for the allocated time (with me peeking in every 5 minutes to see whether the rather flimsy baking parchment enclosure was holding). Luckily all was well and when I took them out of the oven they looked fantastic, all orange and brown marbled, and they tasted fantastic!


Pumpkin-Swirl Brownies
From Martha Stewart Living

Ingredients

(Makes 16-20, depending on how big you cut them and whether you add a lot more pumpkin than you're supposed to!)

8 tablespoons (1 stick) unsalted butter, plus more for pan
6 ounces bittersweet chocolate, chopped
2 cups all-purpose flour
1 teaspoon baking powder
1/4 teaspoon cayenne pepper
1/2 teaspoon salt
1 3/4 cups sugar
4 large eggs
1 tablespoon pure vanilla extract
1 1/4 cups solid-pack pumpkin
1/4 cup vegetable oil
1 teaspoon ground cinnamon
1/4 teaspoon ground nutmeg
1/2 cup chopped pecan nuts

Directions

Preheat oven to 350 degrees. Butter a 9-inch square baking pan or dish. Line bottom of pan with parchment paper; butter lining.

Melt chocolate and butter in a heatproof bowl set over a pan of simmering water, stirring occasionally until smooth.

Whisk together flour, baking powder, cayenne, and salt in a large bowl; set aside. Put sugar, eggs, and vanilla in the bowl of an electric mixer fitted with the paddle attachment; beat until fluffy and well combined, 3 to 5 minutes. Beat in flour mixture.

Divide batter between two medium bowls (about 2 cups per bowl). Stir chocolate mixture into one bowl. In other bowl, stir in pumpkin, oil, cinnamon, and nutmeg. Transfer half of chocolate batter to prepared pan smoothing top with a rubber spatula. Top with half of pumpkin batter. Repeat to make one more chocolate layer and one more pumpkin layer. Work quickly so batters don't set.

With a small spatula or a table knife, gently swirl the two batters to create a marbled effect. Sprinkle with nuts.

Bake until set, 40 to 45 minutes. Let cool in pan on a wire rack. Cut into 16 squares.

Thursday, 6 May 2010

Twisted Black Bottom Cupcakes


I don't know anyone who does not like cupcakes. That is not to say that such people do not exist, but they certaibly do not exist in my little world and certainly not in my office where most of my kitchen-creations end up. I can always count on my dear colleagues to help me finish that batch of cupcakes biscuits or pies that I just cannot bring myself to indulge in any further, and my waistline thanks me for it. I absolutley love cooking and baking. To be honest I do not know what I would do without it as a hobby, but if I were to eat each and every one of my creations, I would undoubtably be the size of a house, especially because I have absolutely no willpower whatsoever. So thankfully I can treat myself to a sample of each biscuit, cake or tart, and the rest comes along with me to the office to be devoured by my fellow workers.


This time it was another Smitten recipe, for Black Bottom Cupcakes. Now my baking rarely turns out the same as the picture and this was certainly true in this case. They overflowed despite me using rather large cupcake-cases. But even though a portion of tasting is with the eye, my colleagues had never seen the picture of how they were supposed to look and well, ignorance is bliss and all that. They went down very well.


I only made one teeny tiny change to the recipe, and that was in the chocolate I used in the cheesecakey mixture. Rather than regular dark chocolate I used Green & Black's Mayan Spiced chocolate. I mainly picked it up while browsing chocolate in the shop on the weekend because I recalled someone telling me that it was very good, so I thought it could only add an interesting twist to the cupcakes. And it certainly did. The spicy undertones that permeated through the cheesecake and chocolate parts of the cupcake gave it a very unusual taste and one that pleasently surprised the tastebuds. I am now an official fan of the spiced chocolate and will definitely be venturing to use it again in the occasional unsuspecting chocolatey recipe.


Black-Bottom Cupcakes

The Great Book of Chocolate, David Lebovitz via Deb at Smitten Kitchen

Yield: 12 full-size cupcakes
(this is the official spin, but as mine overflowed rather a lot, I'd spread the mixture out more to 15 or so full size cupcakes)

For the filling:
8 ounces cream cheese, regular or reduced fat, at room temperature
1/3 cup granulated sugar
1 large egg, at room temperature
2 ounces bittersweet or semisweet chocolate, coarsely chopped

For the cupcakes:
1 1/2 cups all-purpose flour
1 cup firmly packed light brown sugar
5 tablespoons natural unsweetened cocoa powder (not Dutch-process)
1 teaspoon baking soda
1/4 teaspoon salt
1 cup water
1/3 cup unflavored vegetable oil
1 tablespoon white or cider vinegar
1 teaspoon vanilla extract

Make the filling: Beat together the cream cheese, granulated sugar, and egg until smooth. Stir in the chopped chocolate pieces. Set aside.

Make the cupcakes:

1. Adjust the rack to the center of the oven and preheat to 350°F (175°C). Butter a 12-cup muffin tin, or line the tin with paper muffin cups.

2. In a medium bowl sift together the flour, brown sugar, cocoa powder, baking soda, and salt. In a separate bowl, mix together the water, oil, vinegar, and vanilla.

3. Make a well in the center of the dry ingredients and stir in the wet ingredients, stirring until just smooth. Stir any longer and you will over mix the batter and end up with less-than-tender cupcakes.

4. Divide the batter among the muffin cups. Spoon a few tablespoons of the filling into the center of each cupcake, dividing the filling evenly. This will fill the cups almost completely, which is (not in my experience!)fine (so spread them out a little more)

5. Bake for 25 minutes, or until the tops are slightly golden brown and the cupcakes feel springy when gently pressed. These moist treats will keep well unrefrigerated for 2 to 3 days if stored in an airtight container.

Wednesday, 5 May 2010

Smitten Pop-Tarts


Over the last few months I have totally fallen head-over-heels for a blog called Smitten Kitchen. The recipes, photography and witty prose are everything that I could only ever dream that my blog could be. She also happens to have thousands, or maybe even tens or hundreds of thousands of readers and I have none really (in effect I am talking to myself which is both a bit weird and a bit sad). The author Deb truly is a fantastic writer and manages to transport her readers to her tiny little oven of a NYC apartment. After reading her posts for a while you feel like you come to know her husband and darling baby son and you just want to be invited round for dinner. I suppose that this is one of the amazing things about the internet. It can make people who are on opposite sides of the globe feel like they are neighbours.


I have tried a few of her recipes recently and I will eventually force myself to move on to another recipe source, but her creations just look so absolutely fantastic I just want to make them immediately so that I can 'taste the picture'. The latest re-creation is pop-tarts. Living in the UK and never having been to America (only Canada which is not the same) I have not had very much exposure to pop-tarts. I do believe that I have had them once before on a long-ago trip to Canada where upon seeing them in the shops, we just had to get some as pop-tarts for breakfast is what they do on TV. I honestly do not really remeber what they tasted like, so they cannot have been particularly awful or particularly great. Simply forgettable. Besides, my appreciation for food was not as developed all those years ago so I did not have the sense to read the lable to see the horrors in the ingredients list.


So pop-tarts is was this weekend, and previously having been terrified of pastry due to a couple of long-ago super-glueishly stick or sandy dry pastry attmepts, I had mot made any in SO long until last month. Now, after a couple of attempts I have made friends with the pastry gods and now am feeling quite comfortable with it (I know that saying this will probably jinx me but I'll chance it).

Homemade Pop Tarts

Adapted from King Arthur Flour by Deb at Smitten Kitchen (baking goddess)

Pastry
2 cups (8 1/2 ounces) all-purpose flour
1 tablespoon sugar
1 teaspoon salt
1 cup (2 sticks or 8 ounces) unsalted butter, cut into pats
1 large egg
2 tablespoons (1 ounce) milk
1 additional large egg (to brush on pastry)

Cinnamon Filling (enough for 9 tarts)
1/2 cup (3 3/4 ounces) brown sugar
1 to 1 1/2 teaspoons ground cinnamon, to taste
4 teaspoons all-purpose flour
1 large egg, to brush on pastry before filling

Jam Filling
3/4 cup (8 ounces) jam
1 tablespoon cornstarch mixed with 1 tablespoon cold water

Alternate fillings: 9 tablespoons chocolate chips, 9 tablespoons Nutella or other chocolate-hazelnut paste or 9 tablespoons of a delight of your choice, such as salted caramel or a nut paste

To make cinnamon filling: Whisk together the sugar, cinnamon, and flour.

To make jam filling: Mix the jam with the cornstarch/water in a small saucepan. Bring the mixture to a boil, and simmer, stirring, for 2 minutes. Remove from the heat, and set aside to cool. Use to fill the pastry tarts.

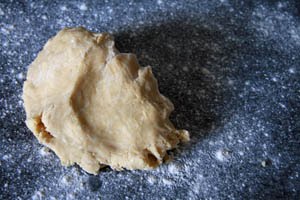
Make the dough: Whisk together the flour, sugar, and salt. Work in the butter with your fingers, pastry blender or food processor until pea-sized lumps of butter are still visible, and the mixture holds together when you squeeze it. If you’ve used a food processor, transfer the mixture to a large bowl. Whisk the first egg and milk together and stir them into the dough, mixing just until everything is cohesive, kneading briefly on a well-floured counter if necessary.

Divide the dough in half (approximately 8 1/4 ounces each), shape each half into a smooth rectangle, about 3×5 inches. You can roll this out immediately (see Warm Kitchen note below) or wrap each half in plastic and refrigerate for up to 2 days.

Assemble the tarts: If the dough has been chilled, remove it from the refrigerator and allow it to soften and become workable, about 15 to 30 minutes. Place one piece on a lightly floured work surface, and roll it into a rectangle about 1/8″ thick, large enough that you can trim it to an even 9″ x 12″. [You can use a 9" x 13" pan, laid on top, as guidance.] Repeat with the second piece of dough. Set trimmings aside. Cut each piece of dough into thirds – you’ll form nine 3″ x 4″ rectangles.

Beat the additional egg and brush it over the entire surface of the first dough. This will be the “inside” of the tart; the egg is to help glue the lid on. Place a heaping tablespoon of filling into the center of each rectangle, keeping a bare 1/2-inch perimeter around it. Place a second rectangle of dough atop the first, using your fingertips to press firmly around the pocket of filling, sealing the dough well on all sides. Press the tines of a fork all around the edge of the rectangle. Repeat with remaining tarts.

Gently place the tarts on a lightly greased or parchment-lined baking sheet. Prick the top of each tart multiple times with a fork; you want to make sure steam can escape, or the tarts will become billowy pillows rather than flat toaster pastries. Refrigerate the tarts (they don’t need to be covered) for 30 minutes, while you preheat your oven to 350°F.

Charming tip from King Arthur: Sprinkle the dough trimmings with cinnamon-sugar; these have nothing to do with your toaster pastries, but it’s a shame to discard them, and they make a wonderful snack. While the tarts are chilling, bake these trimmings for 13 to 15 minutes, till they’re golden brown.
 

Bake the tarts: Remove the tarts form the fridge, and bake them for 20 to 25 minutes, until they’re a light golden brown. Cool in pan on rack.

Friday, 30 April 2010

A not so secret love affair

Its official. I am in love with Nigella's White chocolate and Cranberry Biscuits. I have made 3 batches of them in the past 2 weeks and now I realise that I have a problem. They are just delicious. White chocolate sweetness with cranberry tang and nutty oaty crunch, they are truly heaven in a biscuit, and so simple and quick to make. After my indulgence in the batches biscuits this week I have seen that I do have a problem and now I am banning myself from making them for the next month, at least. But my minor addiction does not mean that anyone else should not attemt these beauties and partake in the deliciousness. So please do, you will not regret it (unless you have an addictive personality!).


I find when I make these biscuits that the mixture is very sticky and a tiny bit too greasy when I have baked them, so the last time I made them I reduced the butter by 1/4 and I was very happy with the result. Also, I do not press down on the rolled balls of biscuit dough with a fork prior to baking as I find that when I leave them as balls they tend to be fatter and less spread out biscuits, which I prefer. These are only personal preferences though so do feel free to stick to the Nigella original recipe.


Cranberry and White Chocolate Cookies

Makes 24-30

Ingredients
150g plain flour
½ tsp baking powder
½ tsp salt
75g rolled oats (not instant)
125g soft butter
75g dark brown sugar
100g caster sugar
1 egg
1 tsp vanilla extract
75g dried cranberries
50g pecans, roughly chopped
150g white chocolate chips
Preheat the oven to 180oC/ 350°F/gas mark 4.

Measure out the flour, baking powder, salt and rolled oats into a bowl.

Put the butter and sugars into another bowl and beat together until creamy — this is obviously easier with an electric mixer of some kind, but you just need to put some muscle into otherwise — then beat in the egg and vanilla.

Beat in the flour, baking powder, salt and oat mixture and then fold in the cranberries, chopped pecans and chocolate chips.

Roll tablespoonfuls of dough into a ball with your hands, and then place them on a lined or greased baking sheet and squish the dough balls down with a fork. You may need two baking sheets or be prepared to make these in two batches.

Cook for 15 minutes; when ready, the cookies will be tinged a pale gold, but be too soft to lift immediately off the tray, so leave the tray on a cool surface and let them harden for about 5 minutes. Remove with a spatula to cool fully on a wire rack.

Enjoy, and do not blame me when you are compelled to make them again, and again, and again....

Tuesday, 27 April 2010

Steamy Stuff

The April 2010 Daring Bakers’ challenge was hosted by Esther of The Lilac Kitchen. She challenged everyone to make a traditional British pudding using, if possible, a very traditional British ingredient: suet.


Personally, I'm not a huge fan of suet. Its not just what it is & what its made of, its just that its animal fat, and I don't love that. So I chose to make a steamed pudding without the suet (I know, I'm a total wimp). But the steaming part was totally new to me. It turned out delicious and was sweet & simple and something that I'd definitely make again. 


Steamed ginger pudding

2tbsp ginger syrup from a jar of stem ginger 

2tsp golden syrup 

175g (6oz) plain flour 

3tsp baking powder 

3 eggs, beaten 

175g (6oz) caster sugar 

175g (6oz) butter, softened 

4 pieces stem ginger, finely chopped 


You will need
1 litre (1¾pt) pudding basin, well buttered
Spoon the ginger syrup and golden syrup into the base of the buttered pudding basin. Place the remaining ingredients in a bowl and beat well for 2 minutes until thoroughly combined. Pour into the basin and level off the top. Cover with a double layer of buttered foil that has been pleated down the centre. Secure the foil with string.
Place the basin in a steamer over a pan of boiling water, cover and steam for 1½ hours. Check the water level every now and then and top up with more boiling water if needed. When cooked, turn out onto a warmed serving plate and serve in wedges with cream, ice cream or custard.

Friday, 16 April 2010

A very New Taste

The 2010 April Daring Cooks challenge was hosted by Wolf of Wolf’s Den. She chose to challenge Daring Cooks to make Brunswick Stew. Wolf chose recipes for her challenge from The Lee Bros. Southern Cookbook by Matt Lee and Ted Lee, and from the Callaway, Virginia Ruritan Club.

Although the principle of most stews are generally all pretty similar, they can have very different flavours and this one is not exception. I can honeslt say that it is a unique taste and I have never tasted anything like it. I do love trying new things and experimenting and to make something like this that was unlike anything that I have attempted before, was a great adventure.

Unfortunately I really had no idea where to get rabbit, so I ended up using chicken and pork, which I would hardly call adventurous. Regardless this culinary foray into the unknown was nonetheless distinctive in flavour. I don't know what it is about the recipe that makes it so different. Maybe it is the lack of herb, maybe the vinegar which i rarely use, but whatever it was it was an education to my palate. being of South African origin, and having lived in New Zealand and now Manchester, England, I have never, ever made anything that is from the South-Eastern of the US of A. When I was reading about the origins of the dish, I was fascinated by the 2 possible origins for the original and first ever Brunswick Stew. We may never know where exactly it came from but I know where its going, into my recipe book for future use.


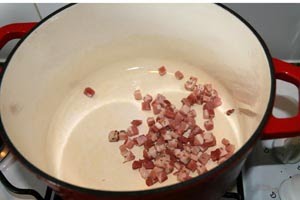
In a very TV-chef like fasion I tried to be very organised with this recipe and prepped all my ingredients before-hand and put them into cute little bowls for ease and speed of constructing the final dish. It takes some time but it does make the cooking process much simpler and easier by doing all the prep ahead. I may work like this more often from now on. I did use pancetta in the recipe instead of the specified slab bacon as I could not find slab bacon on my shoppint trip and I thought pancetta would suffice, and it certainly did. My only other variatios were using pork instead of rabbit and using Adzuki beans instead of butterbeans. Although i would love to try cooking with it I did not know where to buy rabbit, and I've never been a huge fan of butterbeans so I used what I had in the cupboard.


The stew did take some time to make but it is a nice Sunday afternoon endeavour and the finished result tasted fabulous. Its also so verstaile that you could tweak and change it as you like to suite your taste. A definite keeper! Now bring on the next Daring Cooks Challenge!

Recipe One, the Long Way-


From “The Lee Bros. Southern Cookbook: Stories and Recipes for Southerners and Would-Be Southerners” by Matt Lee and Ted Lee

Serves about 12

1/4 lb / 113.88 grams / 4 oz slab bacon, rough diced
2 Serrano, Thai or other dried red chiles, stems trimmed, sliced, seeded, flattened
1lb / 455.52 grams / 16oz rabbit, quartered, skinned
1 4-5lb / 1822.08- 2277.6 grams / 64-80oz chicken, quartered, skinned, and most of the fat removed
1 Tablespoon / 14.235 grams / ½ oz sea salt for seasoning, plus extra to taste
2-3 quarts / 8-12 cups / 64.607-96.9oz Sunday Chicken Broth (recipe below)
2 Bay leaves
2 large celery stalks
2lbs / 911.04 grams / 32oz Yukon Gold potatoes, or other waxy type potatoes, peeled, rough diced
1 ½ cups / 344.88 grams / 12.114oz carrots (about 5 small carrots), chopped
3 ½ / 804.72 grams / 28.266oz cups onion (about 4 medium onions) chopped
2 cups / 459.84 grams / 16.152oz fresh corn kernels, cut from the cob (about 4 ears)
3 cups / 689.76 grams / 24.228oz butterbeans, preferably fresh (1 ¼ lbs) or defrosted frozen
1 35oz can / 996.45 grams / 4 cups whole, peeled tomatoes, drained
¼ cup / 57.48 grams / 2.019 oz red wine vinegar
Juice of 2 lemons
Tabasco sauce to taste

So very decadent

It was my birthday this week and what better way is there to celebrate this occasion then by making a devilishly decadent cake. A Cappuccion Fudge Cheesecake to be precise. I originally saw this recipe on one of my favourite Blogs Smitten Kitchen a few months ago, and I have been waiting for an excuse to make it ever since. I had considered just making it with no special occasion in mind but I could not find a way to justify the construction of a cheesecake that uses 4 tubs of cream cheese and almost 1kg of chocolate without a very good reason. So along came my birthday and with the prefectly good reason of having to bring the traditional cake into the office, I decided on this bohemoth of a cheesecake.

I encountered a slight problem in the first instance as I could not find chocolate wafer biscuits which the recipe calls for to make the cheesecake crust. So I improvised and chose another biscuit but it was one that seemed a rather different consistency so I had to use a bit more biscuit than the prescribed biscuit to chocolate ratio, but it turned out tasty, if somewhat sticky. The hardest part was chopping all 800g of the chocoalte! (Some for the base and the rest for the ganache) I'm sure I ended up with knife-blisters, so you may want to use your food-processor for that part.

Making the Ganache to fill the bottom of the base was quick and easy after the mountain of chocolate had been chopped. It was rich and dark and utterley delicious, and gave me some indication of how rich this cake would be once fully constructed! While the ganache-filled base was chilling I whipped up the cream cheese filling. This took no less than 3 and a half tubs of full fat delicious cream cheese. Once this was combined with the rum and coffee it turned a pale shade of gold and smelled absolutley divine! I was slightly panicked when the filling came so high up the tin. I was certain I'd never fit the last layer in, but the recipe did say to expect this so I took a deep breath and tried not to panic.


I did panic a little again when the cheesecake puffed up well over 2cm above the ende of the base while cooking. I know that this is fairly common and they do sink down again once taken out of the oven, but it looked somewhat terrifying if just for the fact that I knew I'd have to get another layer in there and then decorate it! The cheesecake did sink down again but I had to leave it out of the oven for a lot longer than the recipe's stated 15 minutes before there was space for me to add the sour cream layer, but all was not lost and it worked out. Unfortuantely my sour cream layer bubbled around the edges while in the oven and subsequently did not look very pretty when it came out and had cooled. It rather resembled the surface of a cheese-moon. So in order to make it pretty again I used all the reserved ganache as a spread-over-the-top final layer and it turned out beautifully. Pretty and gorgeous and it certainly earned a lot of oohs and aahs when I brought it in to the office yesterday. I will certainly make it again, but I may have to wait until my next birthday as it is so rich that I am still trying to recover from the slice I had yesterday, and I will most certainly have to run at least 10kms to work off the billions of calories.