Thursday, 14 October 2010

On a Roll, or off a roll perhaps?


Our October 2010 hostess, Lori of Lori’s Lipsmacking Goodness, has challenged The Daring Cooks to stuff grape leaves. Lori chose a recipe from Aromas of Aleppo and a recipe from The New Book of Middle Eastern Food.


Now I had heard of stuffed vine leaves before. I can't remember ever having eaten them, but I was aware of them as a concept. So I was excited when I saw this months challenge. Something completely new that I had never even considered attempting before. 


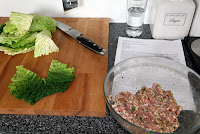
Then came the tiny little hiccup. I could not find vine leaves in any shop, anywhere. Not the general supermarkets, and not the more elite shops that have the posh stuff. Even they only had stuffed vine leaves tinned or fresh in the antipasti section. I have to admit that rather deflated me. I had been looking forward to my foray into the world of the culinary unknown. However, I soon pulled myself towards myself and picked up the dark green plan 'b' cabbage and headed for the checkout. 


I had already decided that I wanted to go with a lamb filling rather than beef, so I was already committed on the filling front. The filling was tasty. Lamb mince, pinenuts, risotto rice, mint, parsley, dill, chilli, salt & pepper.  So the filling was great. The leaves and the wrapping was where I ran into my little kitchen demon of difficulty. You know the one. The evil little creature who oversalts your dish, or takes the garlic out of the pan that you had definitely put in, or makes your usually deft hands turn into two bumbling, confused idiots. Him. 


So needless to say, under the less than helpful influence of my little demon, I was not very successful in making my cabbage leaf and filling combination into pretty, neat little rolls. There were maybe a couple that were not completely hideous, but they were not up to my usual standard, and I was not completely happy with them. However, they did taste nice. Sort of a combination between a brussel sprout and what the English call a Lamb Kebab. But it was fun, it was a new taste, and I now have a good reason to try them again, once I manage to find vine leaves! 

Lamb-stuffed vine leaves


Ingredients 
1 large savoy cabbage
100g risotto rice
2 shallots or small onions
250g minced lamb
25g mint
25g flat-leaf parsley
1 chicken or vegetable stock cube
500ml boiling water
Method
Heat the oven to 150C/gas mark 2. Snip the stalk from fresh vine leaves. Drain preserved ones. Spread them out in a large bowl and pour boiling water over them, making sure the water penetrates the layers, and leave to soak. Fresh leaves need 5 minutes, preserved 20. Drain.
Rinse the rice, cover with boiling water and leave for 5 minutes. Drain and shake dry. Trim and finely chop the onions. Chop the parsley, dill and mint. Place rice,onions, lamb and herbs in a mixing bowl. Season with salt and black pepper. Mix thoroughly.
Place a scoop of filling — exactly how much depends on the size of the leaf but remember the rice will swell as it cooks — at the base of the spine. Fold the base “wings” up over the filling, then the side wings to the middle and carry on rolling upwards, tucking the sides of the top part of the leaf as you go, to ensure that the package is secure.
Make sure the final join is underneath when you pack the rolls snugly in layers — I made two layers in a 21cm by 11cm gratin dish of one-litre capacity. Pour over sufficient stock to immerse. Cover with foil, press down to hold the stuffed vine leaves snugly but not too tightly. Punch a few holes in the top to allow the steam to escape and bake for 90 minutes, checking after 60 in case the stock needs topping up.

Monday, 11 October 2010

Macaroons - Take II


I will rarely admit it, but I don't like being beaten at anything. Or by anything. So the last time I attempted Macarooons (and failed miserably) is a thorn in my side. It is a little black cloud of disaster that I can't escape.


Ok. Maybe I take this far too seriously. But I love my baking that much, and I care that I can (should) do this one thing in my life reasonably successfully, that I cannot help taking a miserable failure very personally. So, last week it was time for Macaroons Take II. And who did I turn to? The famed David Lebovitz. Rumours online have it that he is the king of ice cream and the master of patisserie. So who better to turn to for Macaroon salvation?


Being a mild chocaholic I decided on the chocolate macaroons with chocolate ganache filling. How wrong can you go with all that chocolate?


The last time that I attempted the macaroon my mixture was rather sloppy. Runny. Gooey. It flowed rather than piped. Messy & not remotely pretty. But this time I was sure that I had nailed it. I had a firm mixture that was a pleasure to pipe, and pipe I did. Lots of little macaroons onto my baking sheets. Then into the oven and could barely bring myself to watch as they cooked.


I cannot say that they were perfect. In fact, out of the entire batch of around 4 dozen macaroons, there were only 2 non-cracked ones that I could sandwich together to make one lonely little perfect macaroon. But one is more than none, and although the rest cracked, they tasted - delicious. The perfect mix of crisp outside and a tiny bit chewy on the inside. Why did they crack? Who knows. Was my harsh fan oven too much for their delicate nature? Should they have been left to sit for a couple of hours before being cooked so that their outsides could dry and remain intact? David Lebovitz said that this was not necessary, and the fact that I did have 2 little perfect ones means that there was a tiny percentage of perfectness in the mix somewhere.


But at least I no longer feel beaten by the macaroon demon. We have waged war again and it was more a draw this time than a bitter defeat. Not yet the resounding success that I can one day hope for, but better than it was. Baby steps.


Today I have the pleasure of facing this months daring bakers challenge, so on with the apron, the smile and the determination. Kick butt baking here I come.


Chocolate Macarons
Makes about fifteen cookies
Adapted from The Sweet Life in Paris (Broadway) by David Lebovitz
Macaron Batter
1 cup (100 gr) powdered sugar
½ cup powdered almonds (about 2 ounces, 50 gr, sliced almonds, pulverized)
3 tablespoons (25 gr) unsweetened cocoa powder
2 large egg whites, at room temperature
5 tablespoons (65 gr) granulated sugar
Chocolate Filling
½ cup (125 ml) heavy cream
4 ounces (120 gr) bittersweet or semisweet chocolate, finely chopped
1 tablespoon (15 gr) butter, cut into small pieces
Preheat oven to 350º F (180º C).
Line two baking sheets with parchment paper and have a pastry bag with a plain tip (about 1/2-inch, 2 cm) ready.
Grind together the powdered sugar with the almond powder and cocoa so there are no lumps; use a blender or food processor since almond meal that you buy isn’t quite fine enough.
In the bowl of a standing electric mixer, beat the egg whites until they begin to rise and hold their shape. While whipping, beat in the granulated sugar until very stiff and firm, about 2 minutes.
Carefully fold the dry ingredients, in two batches, into the beaten egg whites with a flexible rubber spatula. When the mixture is just smooth and there are no streaks of egg white, stop folding and scrape the batter into the pastry bag (standing the bag in a tall glass helps if you’re alone).
Pipe the batter on the parchment-lined baking sheets in 1-inch (3 cm) circles (about 1 tablespoon each of batter), evenly spaced one-inch (3 cm) apart.
Rap the baking sheet a few times firmly on the counter top to flatten themacarons, then bake them for 15-18 minutes. Let cool completely then remove from baking sheet.
To make the chocolate filling:
Heat the cream in a small saucepan with the corn syrup. When the cream just begins to boil at the edges, remove from heat and add the chopped chocolate. Let sit one minute, then stir until smooth. Stir in the pieces of butter. Let cool completely before using.
Assembly
Spread a bit of batter on the inside of the macarons then sandwich them together. (You can pipe the filling it, but I prefer to spread it by hand; it’s more fun, I think.)
I also tend to overfill them so you may or may not use all the filling.
Let them stand at least one day before serving, to meld the flavors.
Store in an airtight container for up to 5 days, or freeze. If you freeze them, defrost them in the unopened container, to avoid condensation which will make the macarons soggy.

Sunday, 3 October 2010

My Big Fat Chocolate Bundt

I have been fascinated with the word Bundt for a long time. The first time I really heard it, thought about it as a word, was the first time that I watched My Big Fat Greek wedding a few years ago. At that time I marvelled at the absurdity of it as a word, the ludicrous spelling and the ridiculousness of trying to get a 'd' and a 't' out of your mouth in immediate succession. Then about 6 months ago when my baking obsession stepped up a notch, and I read Joy The Baker's blog post on a Big Fat Chocolate Bundt, I realised that I had never, ever made any type of bundt. Never! Ever!! So I went online to good old amazon and bought myself a pretty (and) substantial bundt tin. This tin then proceeded to sit on one of my kitchen overflow shelves until about 2 weeks ago. That was when an innocent re-run of My Big Fat Greek Wedding brought back the desire for a bundt. Big time. So I retrieved it from the dark corner of the shelf that it had been relegated to and dusted it off, and discovered the most moist and delicious chocolate bundt cake in the world. 
This cake combines all sorts of lovely things. Sugar, cocoa powder, eggs, a cup of oil... a CUP of OIL?! Really?! (was what I was mentally exclaiming to myself). But I managed to take a deep breath, put my faith in Joy, and the rather fickle baking gods, and poured it in. The whole darn cup. Sheeeeesh.  
Now I do have complete and utter faith in Joy. If she said that this recipe is a winner, then I believe her, but I was nonetheless scared by this batter even once I was over the cup of oil trauma. The batter was very, very runny. Like drinkable runny. Like no-way-in-hell-will-this-ever-turn-into-a-cake type runny. The recipe did warn about this and said not to worry, but honestly, it does seem against all the laws of baking physics that a substance can go from being very liquid, to a divine slid in just an hour under the magical influence of the heat of my oven. But it did. And it was amazing. 
I don't know if it was my over-zealous fan-assisted-(assisted??) oven, or whether I whisked the mixture too long or too fast, but my bundt rose. Boy did it rise. A lot. A heck of a lot. I was genuinely concerned as to whether I would get it out of the tin, and if I did, what on earth would it look like, with the pretty cakey pattern from the tin balanced on a mound of formless cake that was a good inch above the edge of the tin.  But not to worry, once I had turned the dear bundt out of its tin and onto a cooling rack, it did settle down a bit. It wasn't a perfect looker, but who cares with a taste like that. 
I have to now spare a thought for the glaze for this cake. It is simply a small taste of heaven. If you could eat the pearly gates, they would taste like this glaze. It is divine. Be warned though, the below recipe makes about double the amount of glaze that you actually need to coat this cake, so unless you plan on eating chocolate glaze by the spoonful or using it as an ice cream sauce (I can testify that this is a noble function of this delectable elixir), halve the recipe. That will give you plenty to glaze the cake, which in all honesty could stand up strongly by itself without any glaze at all. 
The Best Chocolate Bundt Cake with chocolate glaze

     makes one 10-inch bundt cake
     from The Big Sur Bakery Cookbook (but courtesy of Joy the Baker's beautiful blog)
  
For the Cake:
1 1/4 cups plus 1 Tablespoon brewed coffee (I used a good quality instant and it came out just fine)
3/4 cup  cocoa powder
2 1/4 cups sugar
1 1/4 teaspoons salt
2 1/2 teaspoons baking soda
2 whole eggs
1 egg yolk
1 1/4 cups plus 1 Tablespoon buttermilk
1 cup plus 2 Tablespoon canola oil (or vegetable or sunflower)
1 1/2 teaspoons vanilla extract
2 1/2 cups, plus 2 Tablespoons all-purpose flour, sifted


For the Glaze:
6 ounces dark chocolate (at least 70% cocoa solids)
3/4 cup unsalted butter
3 cups icing sugar
1/2 cup sour cream, at room temperature
1/4 cup brewed coffee, cooled (again, I used instant)

Place an oven rack in the center of the oven and preheat to 350 degrees F.  
Grease and flour a 10-inch Bundt pan and set aside.  

To make the cake batter:  Put brewed coffee and cocoa powder in a small saucepan and bring to a boil, whisking frequently.  Remove from the heat and let come to room temperature.  
In the bowl of a stand mixer fit with a whisk attachment, mix together sugar, salt, baking soda, eggs and egg yolk on low speed for about 1 minute.  Add the buttermilk, oil and vanilla extract and mix on low again for another minute.  
Add the flour and mix on medium speed for 2 minutes.  Add the cooled cocoa mixture and mix on medium speed for 3 minutes.  The batter will be very runny - its ok - its meant to be like that - don't panic.  Pour into the prepared cake pan and bake for 1 hour, or until a cake tester inserted in the cake comes out clean.  
Let the cake cool completely in the pan and then invert onto a cooling rack.  

To make the glaze:  Chop the chocolate into small pieces, put them in a heatproof bowl (or a double boiler), and set the bowl over a pot of barely simmering water.  Be sure that the bottom of the bowl does not touch the boiling water.  Remove the bowl from the heat when all of the chocolate bits have melted.  
Melt the butter in a separate pan or in the microwave.  Whisk the melted butter into the melted chocolate until thoroughly incorporated.  Sift in half of the powdered sugar.  Add the sour cream and whisk to combine.  Sift in the remaining powdered sugar and whisk until smooth.  The glaze should be thick and shiny.  Lastly, add the coffee and whisk to create a glossy glaze.  
Pour the glaze over the Bundt cake, covering it completely.  Leave at room temperature until ready to serve.